For my studio session composition, I decided on multiple synths to use and started by recording short drum loops & musical phrases taking inspiration from the Saytek video, but instead of using the session view I chose arrangement view as I was making a song compared to a live set. once I had a good amount of loops I started to extend the loop and arrange the tracks as I added sounds. I carried this process on, adding/ editing tracks until I felt I had a full track.
This picture shows the setup I used and a diagram of the basic connectivity I used, this changed throughout the session when I wanted to control or modulate a synth in a different way:
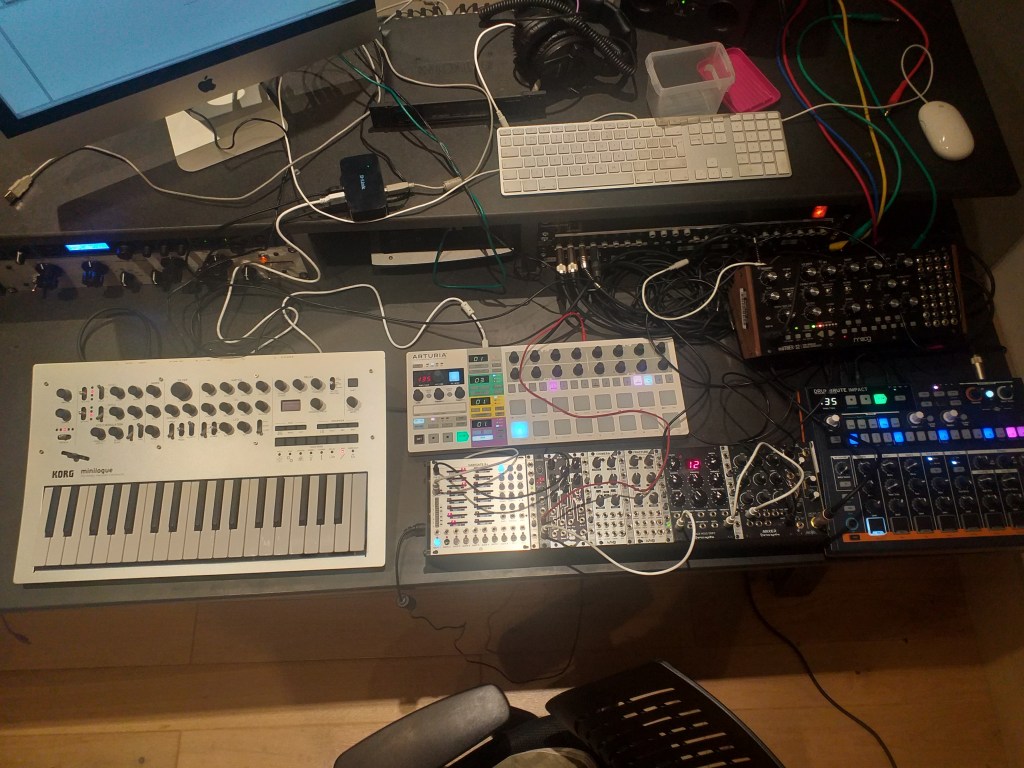
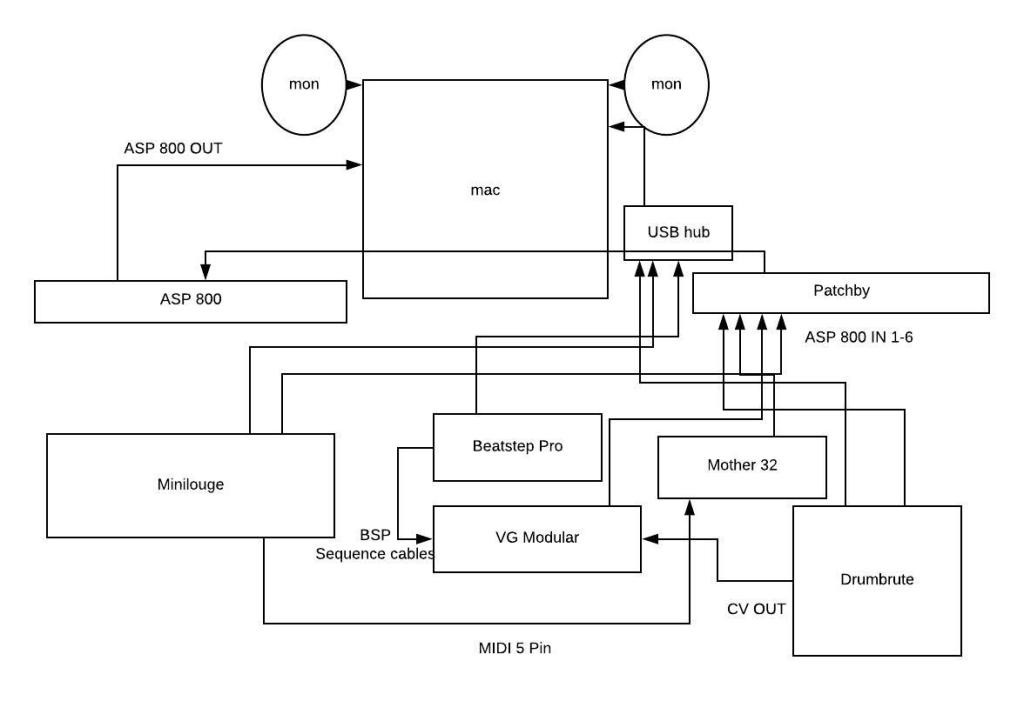
With this setup, I could sync all synths to Ableton’s clock so that the patterns will start from their initial point. The CV out sent a constant tick to the modular which could trigger any one of the sound modules, as well as the beat step pro being able to send out 8 drum gate patterns. The Korg is sending MIDI information to the Moog and works similar to a MIDI controller, as it is also synced to Ableton, I could write a pattern before recording then modulate the Moog whilst it’s recording to add movement to the bass.
With this setup, I could easily create new ideas on the fly whenever I felt something new was needed just by adding a new track and routing it to record the right channel. I really enjoyed this way of working as all sounds being generated were external and I could quickly add parts to the track without any re wiring.
DAW sound source collecting
For my DAW project, I used many of the same synths, but instead of creating the song in the session, I dedicated the studio sessions to collecting sounds which I could then further edit and manipulate when I was writing the song.
Take the drums for example. For the main Kick & Snare, I used the rhythm wolf, but I then layered them with sounds I had generated from the VG Modular in a later session to create fuller drums. This kind of process is quite common in Drum & bass as it gives the drums more punch which is essential in the genre.
A different method I also used was to take the source sounds and further process them. In my session with the mother 32, I created a lot of dub-like LFO sirens. When I exported these into the DAW, I managed to make a range of sounds from percussion to riser style FX. I also did this with some of the sounds I collected from the Korg to create a richer soundscape.
This way of working takes more time compared to the studio session track, but I feel the extra time and processing does result in a better sounding track.
 Hardware Composition Portfolio